he Walking Dead: No Man's Land, official mobile game produced by Next Games[1] and based on AMC's The Walking Dead has launched on iOS 27 September 2015 and Android on 28 October 2015.
For a more complete wiki page, follow this link.
Gameplay
You will control a group of survivors with your only objective being to keep them alive. Decisions for food, water, and shelter will be made with life and death consequences. Sacrifices will be made and tough choices lie ahead as not everyone will make it out alive.
Additionally, you will be solving strategic puzzles all while building your group and developing a safe refuge. Some of the features included are weekly challenges, story missions, outposts (PvP) and much more.
Characters
Terminus
- Joel
- Ken
- Ann
- Daryl Dixon
- Angie
- Hazel
- Katie
- Tim
To be updated
More characters are introduced in other episodes, but are not currently listed
Character Types
Each and every survivor in The Walking Dead: No Man’s Land bears the scars from life and death struggles. Form a group and train them to fight with scavenged and improvised weapons. Use their individual skills to navigate deadly missions and do whatever it takes to stay humans.
There are six types of characters (as of 2/29/16), all with unique weapons, armor, and skills. Learning their abilities well is essential in order to complete missions efficiently and with minimal damage. Each character class also has their own special ability, called a Charge Ability. "Charge Abilities become available when a survivor has killed enough walkers to to charge their ability - usually three [shooters being the exception and only needing two kills]. When available, the Charge Ability bar under the survivor's portrait in the combat screen glows [green]. Tap the bar and then target a walker or an area, depending on the ability, to activate."[2]
| Class | Health | Excels against... | Charge Ability |
|---|---|---|---|
| Bruiser | High | Crowd control | Smash: Area stun (up to 8 walkers in a circle) and damage |
| Shooter | Medium | Single targets | Quick Shot: Free attack |
| Hunter | Low | Crowds | Aimed Shot: Automatic critical hit |
| Assault | High | Crowds | Suppression: Stun and damage |
| Warrior | Medium | Tight packs of enemies | Quick Slash: Bonus attack |
| Scout | Low | Single targets | Brain Stab: Extra damage |
As crowd control experts, Bruisers are unfazed by large groups of walkers. They carry blunt, heavy weapons that inflict maximum damage to everything within striking distance.
Trained to kill, Shooters have what it takes to finish off wounded enemies with a single shot to the head. Pistols and revolvers are their weapon of choice, a possible throwback to their lives before the epidemic.
Hunters keep cool, taking out enemies from distance with perfectly aimed bullets. Scoped and long range rifles are their speciality - the more powerful and accurate, the better.
Using suppressive fire, Assault specialists mow down crowds of walkers in one burst. They won’t accept anything less than heavy fire power, using a variety of semi-automatic rifles to maximum effect.
Silent, stealthy and lethally accurate, Warriors are highly trained killers. They make a personal connection to their sword and become masters of cutting down walkers before they have even been detected.
The Scouts are swift movers who specialize in single target strikes. Armed with little more than a blade or screwdriver, they are able to inflict critical brain damage upon their enemies - human or otherwise.
Rarity
"Each time a survivor appears (new gear, as well) they will have a grade of rarity. The higher the grade, the more powerful they are but this also affects how often you'll encounter them. This is shown by the amount of stars and color.
There are five grades of rarity in the game:" [2]
- Common (1 star, gray)
- Uncommon (2 stars, beige)
- Rare (3 stars, green)
- Epic (4 stars, blue)
- Legendary (5 stars, gold)
Grade will also affect the number of times you can upgrade them and the level of the survivor's specific traits.
Traits
Survivor Traits are special abilities that distinguish particular survivors from the rest. These traits add specific benefits in battle and are unlocked once that survivor has reached a specific level (weapons and armor can also acquire specific traits).
Viewing Traits
Visit the survivor menu and select a character. On the right of the screen you'll find a survivor's traits with the required level. Tap on the trait to find out how it benefits your survivor.
Character Levels
Assault |
1-Star Damage / Health |
2-Star Damage / Health |
3-Star Damage / Health |
4-Star Damage / Health |
5-Star Damage / Health |
|---|---|---|---|---|---|
| Level 1 |
-- |
-- |
-- |
-- |
-- |
| Level 2 |
-- |
-- |
-- |
-- |
-- |
| Level 3 |
-- |
-- |
-- |
-- |
-- |
| Level 4 |
-- |
-- |
-- |
-- |
-- |
| Level 5 |
43 / 197 |
-- |
-- |
-- |
-- |
|
Level 6 |
-- |
-- |
53 / 232 |
-- |
-- |
| Level 7 |
51 / 205 |
-- |
61 / 245 |
66 / 266 |
-- |
| Level 8 |
57 / 219 |
-- |
68 / 262 |
74 / 284 |
-- |
| Level 9 |
-- |
-- |
77 / 283 |
84 / 306 |
-- |
| Level 10 |
75 / 258 |
-- |
89 / 209 |
97 / 335 |
-- |
| Level 11 |
88 / 284 |
96 / 312 |
105 / 340 |
114 / 369 |
-- |
| Level 12 |
103 / 317 |
-- |
123 / 380 |
133 / 412 |
-- |
| Level 13 |
-- |
134 / 393 |
-- |
158 / 465 |
170 / 501 |
| Level 14 |
-- |
-- |
-- |
-- |
-- |
| Level 15 |
-- |
-- |
-- |
-- |
-- |
| Level 16 |
-- |
-- |
-- |
-- |
-- |
| Level 17 |
-- |
-- |
-- |
-- |
-- |
| Level 18 |
-- |
-- |
-- |
-- |
-- |
| Level 19 |
-- |
-- |
-- |
-- |
-- |
| Level 20 |
-- |
-- |
-- |
-- |
-- |
Scout |
1-Star Damage / Health |
2-Star
Damage / Health |
3-Star
Damage / Health |
4-Star
Damage / Health |
5-Star
Damage / Health |
|---|---|---|---|---|---|
| Level 1 |
40 / 66 |
-- |
47 / 79 |
-- |
-- |
| Level 2 |
51 / 85 |
56 / 93 |
61 / 101 |
-- |
-- |
| Level 3 |
59 / 98 |
64 / 107 |
70 / 117 |
-- |
-- |
| Level 4 |
67 / 109 |
73 / 119 |
80 / 130 |
-- |
-- |
| Level 5 |
-- |
82 / 131 |
89 / 143 |
-- |
-- |
|
Level 6 |
-- |
92 / 142 |
100 / 155 |
-- |
-- |
| Level 7 |
93 / 139 |
102 / 152 |
111 / 166 |
120 / 180 |
-- |
| Level 8 |
103 / 150 |
113 / 164 |
123 / 179 |
133 / 194 |
-- |
| Level 9 |
116 / 164 |
127 / 180 |
139 / 196 |
150 / 213 |
162 / 229 |
| Level 10 |
132 / 181 |
145 / 199 |
158 / 217 |
171 / 235 |
-- |
| Level 11 |
152 / 202 |
167 / 222 |
182 / 242 |
197 / 262 |
212 / 282 |
| Level 12 |
-- |
194 / 251 |
212 / 274 |
230 / 297 |
247 / 320 |
| Level 13 |
-- |
227 / 288 |
-- |
269 / 340 |
289 / 366 |
| Level 14 |
-- |
270 / 333 |
-- |
319 / 393 |
-- |
| Level 15 |
-- |
-- |
-- |
-- |
-- |
| Level 16 |
-- |
-- |
-- |
-- |
-- |
| Level 17 |
-- |
-- |
-- |
-- |
-- |
| Level 18 |
-- |
-- |
-- |
-- |
-- |
| Level 19 |
-- |
-- |
-- |
-- |
-- |
| Level 20 |
-- |
-- |
-- |
-- |
-- |
Warrior |
1-Star Damage / Health |
2-Star
Damage / Health |
3-Star
Damage / Health |
4-Star
Damage / Health |
5-Star
Damage / Health |
|---|---|---|---|---|---|
| Level 1 |
-- |
-- |
-- |
-- |
-- |
| Level 2 |
-- |
-- |
-- |
-- |
-- |
| Level 3 |
-- |
-- |
-- |
-- |
-- |
| Level 4 |
-- |
-- |
-- |
-- |
-- |
| Level 5 |
-- |
-- |
-- |
-- |
-- |
|
Level 6 |
-- |
75 / 188 |
82 / 205 |
-- |
-- |
| Level 7 |
78 / 181 |
85 / 199 |
-- |
101 / 235 |
-- |
| Level 8 |
89 / 194 |
97 / 213 |
106 / 232 |
115 / 252 |
-- |
| Level 9 |
102 / 210 |
112 / 230 |
122 / 251 |
132 / 272 |
-- |
| Level 10 |
118 / 229 |
129 / 251 |
141 / 274 |
153 / 297 |
-- |
| Level 11 |
138 / 253 |
151 / 278 |
165 / 303 |
179 / 238 |
-- |
| Level 12 |
162 / 282 |
178 / 310 |
194 / 338 |
210 / 366 |
-- |
| Level 13 |
-- |
212 / 350 |
231 / 382 |
250 / 414 |
-- |
| Level 14 |
-- |
254 / 402 |
-- |
-- |
-- |
| Level 15 |
-- |
-- |
-- |
-- |
-- |
| Level 16 |
-- |
-- |
-- |
-- |
-- |
| Level 17 |
-- |
-- |
-- |
-- |
-- |
| Level 18 |
-- |
-- |
-- |
-- |
-- |
| Level 19 |
-- |
-- |
-- |
-- |
-- |
| Level 20 |
-- |
-- |
-- |
-- |
-- |
Bruiser |
1-Star Damage / Health |
2-Star
Damage / Health |
3-Star
Damage / Health |
4-Star
Damage / Health |
5-Star
Damage / Health |
|---|---|---|---|---|---|
| Level 1 |
-- |
-- |
-- |
19 / 137 |
-- |
| Level 2 |
20 / 137 |
21 / 150 |
23 / 164 |
-- |
-- |
| Level 3 |
-- |
26 / 170 |
-- |
31 / 201 |
-- |
| Level 4 |
-- |
30 / 189 |
-- |
-- |
39 / 240 |
| Level 5 |
33 / 187 |
-- |
-- |
-- |
-- |
|
Level 6 |
-- |
41 / 221 |
-- |
-- |
-- |
| Level 7 |
43 / 212 |
47 / 233 |
51 / 254 |
55 / 275 |
-- |
| Level 8 |
50 / 227 |
54 / 249 |
59 / 272 |
64 / 295 |
-- |
| Level 9 |
58 / 244 |
63 / 268 |
69 / 292 |
75 / 317 |
81 / 341 |
| Level 10 |
68 / 266 |
74 / 292 |
81 / 319 |
88 / 345 |
-- |
| Level 11 |
81 / 293 |
89 / 322 |
97 / 351 |
105 / 380 |
113 / 410 |
| Level 12 |
-- |
105 / 359 |
115 / 392 |
124 / 425 |
-- |
| Level 13 |
-- |
126 / 405 |
137 / 442 |
149 / 479 |
-- |
| Level 14 |
-- |
152 / 464 |
-- |
-- |
-- |
| Level 15 |
-- |
-- |
-- |
-- |
-- |
| Level 16 |
-- |
-- |
-- |
-- |
-- |
| Level 17 |
-- |
-- |
-- |
-- |
-- |
| Level 18 |
-- |
-- |
-- |
-- |
-- |
| Level 19 |
-- |
-- |
-- |
-- |
-- |
| Level 20 |
-- |
-- |
-- |
-- |
-- |
Hunter |
1-Star Damage / Health |
2-Star
Damage / Health |
3-Star
Damage / Health |
4-Star
Damage / Health |
5-Star
Damage / Health |
|---|---|---|---|---|---|
| Level 1 |
30 / 66 |
-- |
-- |
-- |
-- |
| Level 2 |
39 / 85 |
-- |
-- |
50 / 110 |
-- |
| Level 3 |
46 / 98 |
50 / 107 |
-- |
59 / 127 |
-- |
| Level 4 |
-- |
58 / 119 |
-- |
68 / 141 |
-- |
| Level 5 |
-- |
67 / 131 |
-- |
79 / 155 |
-- |
|
Level 6 |
-- |
75 / 142 |
82 / 155 |
89 / 168 |
-- |
| Level 7 |
78 / 139 |
85 / 152 |
-- |
101 / 180 |
-- |
| Level 8 |
89 / 150 |
97 / 164 |
106 / 179 |
115 / 194 |
-- |
| Level 9 |
102 / 164 |
112 / 180 |
122 / 196 |
132 / 213 |
-- |
| Level 10 |
118 / 181 |
129 / 199 |
141 / 217 |
153 / 235 |
-- |
| Level 11 |
138 / 202 |
151 / 222 |
165 / 242 |
179 / 262 |
-- |
| Level 12 |
-- |
178 / 251 |
194 / 274 |
210 / 297 |
-- |
| Level 13 |
-- |
212 / 288 |
-- |
250 / 340 |
-- |
| Level 14 |
-- |
254 / 333 |
-- |
300 / 393 |
-- |
| Level 15 |
-- |
-- |
-- |
362 / 462 |
-- |
| Level 16 |
-- |
-- |
-- |
-- |
-- |
| Level 17 |
-- |
-- |
-- |
-- |
-- |
| Level 18 |
-- |
-- |
-- |
-- |
-- |
| Level 19 |
-- |
-- |
-- |
-- |
-- |
| Level 20 |
-- |
-- |
-- |
-- |
-- |
Shooter |
1-Star Damage / Health |
2-Star
Damage / Health |
3-Star
Damage / Health |
4-Star
Damage / Health |
5-Star
Damage / Health |
|---|---|---|---|---|---|
| Level 1 |
-- |
-- |
-- |
-- |
-- |
| Level 2 |
-- |
-- |
-- |
-- |
-- |
| Level 3 |
-- |
-- |
-- |
-- |
-- |
| Level 4 |
-- |
-- |
-- |
-- |
-- |
| Level 5 |
-- |
-- |
-- |
-- |
-- |
|
Level 6 |
-- |
92 / 188 |
100 / 205 |
-- |
-- |
| Level 7 |
93 / 181 |
102 / 199 |
111 / 217 |
120 / 235 |
-- |
| Level 8 |
103 / 194 |
113 / 213 |
123 / 232 |
133 / 252 |
-- |
| Level 9 |
116 / 210 |
127 / 230 |
139 / 251 |
150 / 272 |
-- |
| Level 10 |
132 / 229 |
145 / 251 |
158 / 274 |
171 / 297 |
-- |
| Level 11 |
152 / 253 |
167 / 278 |
182 / 303 |
197 / 328 |
-- |
| Level 12 |
177 / 282 |
194 / 310 |
212 / 338 |
230 / 366 |
-- |
| Level 13 |
-- |
227 / 350 |
248 / 382 |
269 / 414 |
-- |
| Level 14 |
-- |
270 / 402 |
295 / 439 |
319 / 475 |
-- |
| Level 15 |
-- |
-- |
-- |
-- |
-- |
| Level 16 |
-- |
-- |
-- |
-- |
-- |
| Level 17 |
-- |
-- |
-- |
-- |
-- |
| Level 18 |
-- |
-- |
-- |
-- |
-- |
| Level 19 |
-- |
-- |
-- |
-- |
-- |
| Level 20 |
-- |
-- |
-- |
-- |
-- |
Missions
The main story begins on the road to Terminus, where a small group of survivors manage to escape. Together they must fight walkers through the total of 10 episodes of story missions and weekly guild challenges for allied players, which add a social dimension to the game.
Trained by Daryl Dixon, your group will fight the walker menace and save other survivors from Terminus to the Prison.
Story Missions
Each title below is referred to as an Episode within the game. Each episode usually contains 5-7 missions that must be completed in order.
- Road to Terminus
- Military Rations
- Prison Voices
- Shadow of Eden
- American Pastoral
- Lakeside
- Proving Grounds
- Rendevouz with Eden
- The Pursuit
- Escape Distractions
- The Descent
- Black Forest
- The Factory
- The Church
Each Episode is replayable upon completing all missions, and each play through gets harder than the last. Once this feature becomes available, a symbol will appear next to the title and you will be able to replay all missions within that episode.
| Level | Image |
|---|---|
| Hard: Introduced after first completion |  |
| Nightmare: After second completion |   |
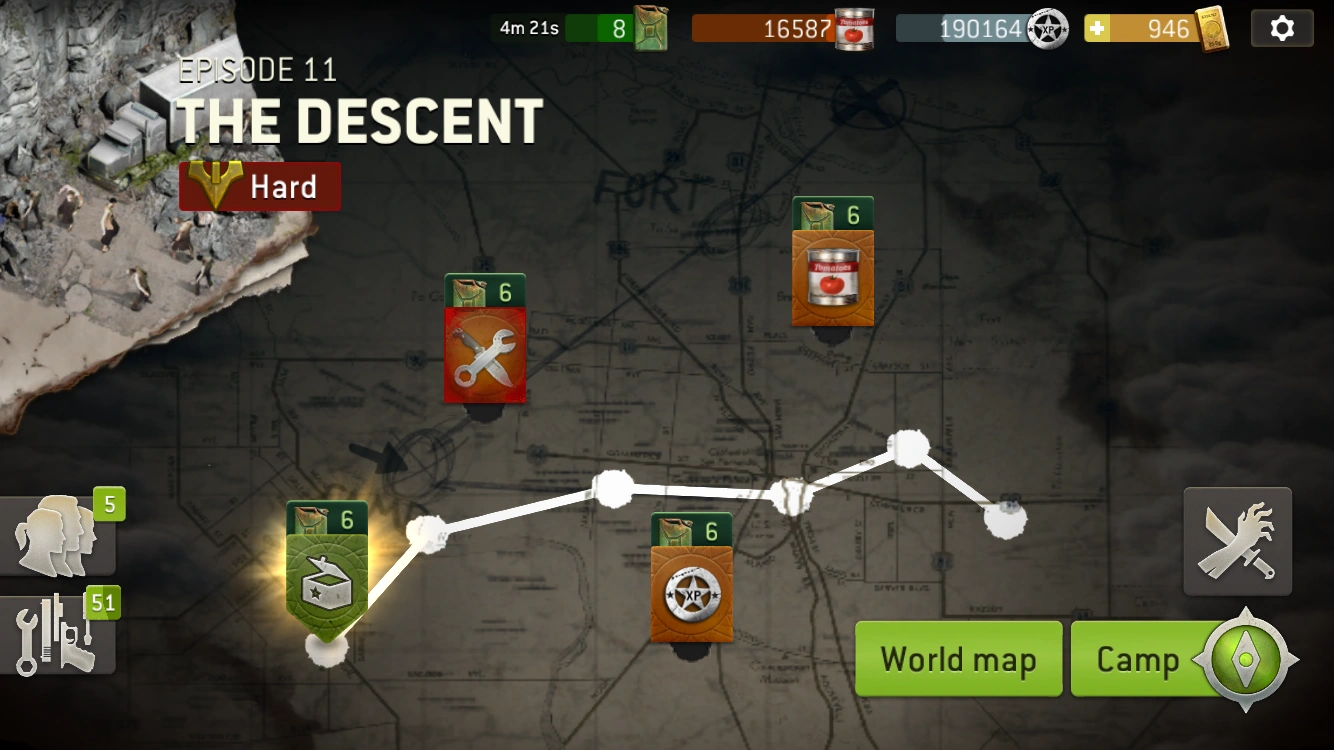
Exploration Missons
These are stand alone missions that can be played without interfering with the story of a particular episode and are a great way to gather much needed resources and gear. Each one has a recommended level, so pay attention when choosing your mission.
There are three types of exploration missions:
- Resource: by completing this mission type, you will be guaranteed resources as a reward (the mission is shown with a can of tomato soup)
- Experience (XP): by completing this mission type, you will be guaranteed XP as a reward (the mission is shown with an image similar to a sheriff badge)
- Equipment you have an increased chance of finding equipment in the reward chests at the end of the level (shown with a wrench and knife, and is tinted red compared to normal missions)
*Levels of weapons and quantity of resources/XP received is determined by the recommended level.

Screenshot of Episode 11 map on IOS, displaying both exploration missions and a story mission.
Resources[2]
- Supplies: Used to upgrade buildings. Gathered from farms in the camp.
- Experience Points (XP): Used to upgrade survivors and equipment. Gathered from tents in the camp.
- Gas: Needed to send your survivors out on missions. Generates over time.
- Gold: Used for special upgrades, speeding up timers, instantly upgrade buildings. Found as a rare reward or may be purchased.
- Radios: Used for recruiting survivors. Only found as a rare reward.
- Trade Goods: See below: Outposts > Trade Goods
The above resources may also be found as rewards for completing missions and challenges, or by killing the walkers that appear around your camp's perimeter (trade goods may be the exception and only earned PVP).
Camp
"The camp is your temporary safe haven. It is where your group decided to make it's stand. Here you can upgrade buildings you'll need to help improve your survivors' survival skills and gear, but you'll also be able to interact with other survivor groups.
In the camp you can manage your band of survivors. Recruit more survivors, train them, give them powerful equipment and build a hospital so they can recover in between missions."[2]
Buildings
Council
Maximum number: 1
| Level | Cost to upgrade to/time | Upgrades available | Storage Capacity sup/xp | BP |
|---|---|---|---|---|
| 1 | ? | ? | ? | ? |
| 2 | ? | ? | ? | ? |
| 3 | ? | ? | ? | ? |
| 4 | 4K/1h30m | +1 Supplies Storage, +1 Walker Pit, +Outpost | ? | ? |
| 5 | 59 Gold or 8.6K/3h | +1 Farm Plot | ? | ? |
| 6 | 116 Gold or 20K/7h30m | +1 Tents | 1.5k / 40K | 54 |
| 7 | 153 Gold or 33K/9h | - | 1.5k / 60K | 74 |
| 8 | 219 Gold or 62K/10h30m | +1 Farm Plot | 1.5k / 75K | ? |
| 9 | ? | ? | 1.5k / 100K | ? |
| 10 | ? | + 1 Supplies Storage | ? | ? |
| 11 | 440 gold or 300K/18h | - | -/50K | ? |
Campfire
"This is where you find out about your next story mission." You can also collect rewards for finishing an episode.
Maximum level: 1 Maximum number: 1
Memorial
"Dead survivors are recorded on the Memorial. Be careful on deadly missions or you'll end up here!" This building displays the name of the deceased survivor, time of death (MM/DD/YYYY), days survived, number of missions they went on, and total kills. This could be considered an 'optional' building, as it has no effect on gameplay.
Maximum level: 1 Maximum number: 1
Mission Car
"Transport your survivors to their missions. The Mission Car increases gas storage capacity and produces gas."
Maximum number: 1
| Level | Cost to upgrade to/time | Storage Capacity | BP | Available at Council level... |
|---|---|---|---|---|
| 1 | 80 Supplies | 6 | 4 | 1 |
| 2 | ? | 9 | ? | 3 |
| 3 | 83 Gold or 17k/4h | 11 | 36 | 5 |
| 4 | 172 Gold or 56k/6h | 13 | ? | 7 |
| 5 | 312 Gold or 140k/11h | 15 | ? | 9 |
| 6 | 474 Gold or 430k/15h | 17 | 144 | 11 |
| 7 | 713 Gold or 860k/21h | 19 | ||
| ? |
Training Grounds
"Train your survivors in the Training Grounds to increase their effectiveness during missions." Upgrading this building allows you to train your survivors, or upgrade their levels. This is essential to progress through the game.
Maximum number: 1
| Level | Cost to upgrade to/time | Max survivor level | BP | Available at Council level... |
|---|---|---|---|---|
| 1 | 150 Supplies/3s | 2 | ? | 1 |
| 2 | 3 | ? | 2 | |
| 3 | 4 | ? | 3 | |
| 4 | 51 Gold or 7.6k/2h15m | 5 | 30 | 4 |
| 5 | 59 Gold or 19k/5h | 6 | 43 | 5 |
| 6 | 135 Gold or 33k/6h45m | 7 | 59 | 6 |
| 7 | 201 Gold or 59k/9h | 8 | 77 | 7 |
| 8 | 255 Gold or 81k/10h30m | 9 | ? | 8 |
| 9 | 325 Gold or 150k/12h | 10 | ? | 9 |
| 10 | 11 | ? | 10 | |
| 11 | 538 Gold or 520k/18h | 12 | ? | 11 |
| 12 | 13 | ? | 12 | |
| 13 | 756 Gold or 920k/23h | 14 | ? | 13 |
| 14 | 921 Gold or 1.26M/1d2h | 15 | 14 |
Workshop
"Upgrade weapons and armor here, and see what traits will be unlocked by increasing levels of both armor and weapons. This is also where you can scrap Equipment that you don't want and get XP in return."
Maximum number: 1
| Level | Cost to upgrade to/Time to Upgrade | Max Weapon Level to upgrade | BP | Available at Council Level |
|---|---|---|---|---|
| 1 | 3 | 3 | ||
| 2 | 51 Gold or 7.6k/2h15m | 5 | 60 | 4 |
| 3 | 94 Gold or 19k/5h | 6 | 43 | 5 |
| 4 | 135 Gold or 33k/6hh45m | 7 | 59 | 6 |
| 5 | 201 Gold or 59k/9h | 8 | 77 | 7 |
| 6 | 255 Gold or 81k/10h30m | 9 | 8 | |
| 7 | 10 | 9 | ||
| 8 | 402 Gold or 270k/15h | 10 | 145 | 10 |
| 9 | 11 | 11 | ||
| 10 | 647 Gold or 710k/21h | 13 | 203 | 12 |
| 11 | 756 Gold or 920k/23h | 14 | 235 | 13 |
| 12 | 15 | |||
| 13 | ||||
| 14 | ||||
| 15 | ||||
| 16 | ||||
| ? |
Radio Tent
"Use the Radio Tent to search for survivors. Upgrade the Radio Tent to find higher level survivors!"
Maximum number: 1
| Level | Cost to upgrade to/time | Max initial survival level | BP | Available at Council level... |
|---|---|---|---|---|
| 1 | 2 | ? | 3 | |
| 2 | 51 Gold or 7.6k/2h15m | 5 | ? | 4 |
| 3 | 135 Gold or 33k/6h45m | 6 | 59 | 6 |
| 4 | 255 Gold or 81k/10h30m | 8 | ? | 8 |
| 5 | 402 Gold or 270k/15h | 10 | ? | 10 |
| 6 | 647 Gold or 710k/21h | 12 | 203 | 12 |
| 7 | 921 Gold or 1.26M/1d2h | 14 | ? | 14 |
| ? |
Hospital
"Heals injured survivors. Upgrade your Hospital for faster healing" and more healing slots.
Maximum number: 1
| Level | Cost to upgrade to/time | Healing time reduction | Concurrent healing slots | BP | Available at Council level... |
|---|---|---|---|---|---|
| 1 | ? | ? | 1 | ? | ? |
| 2 |
28 Gold or 2.8k/45m |
2 minutes | 1 | ? | 3 |
| 3 | 83 Gold or 17k/4h | 5 minutes | 2 | 36 | 5 |
| 4 | 172 Gold or 56k/6h | 10 minutes | 2 | 64 | 7 |
| 5 | ? | 15 minutes | 2 | ? | 9 |
| 6 | 474 Gold or 430k/15h | 20 minutes | 3 | ? | 11 |
| 7 | ? | ? | 3 | ? | 13 |
| ? |
Supplies Storage
"Increases storage capacity for supplies."
| Level | Cost to upgrade to/time | Storage capacity | BP | Available at Council level... |
|---|---|---|---|---|
| 1 | 400 Supplies | 2.500 | 7 | 2 |
| 2 |
22 Gold or 2.4k/22m30s |
10.000 | 13 | 3 |
| 3 | 36 Gold or 4.9k/1h | 30,000 | 20 | 4 |
| 4 | 107 Gold or 30k/4h | 70,000 | 39 | 6 |
| 5 | 208 Gold or 75k/6h | 140,000 | ? | 8 |
| 6 | 328 Gold or 210K/9h | 280,000 | 97 | 10 |
| 7 | 500 Gold or 490K/15h | 560,000 | 133 | 12 |
| 8 | 807 Gold or 1.07M/21h | 1,120,000 | ? | 14 |
| ? |
Farm Plot
| Level |
Cost to upgrade to/upgrade time |
Production |
Holds Max |
BP | Available at Council Level |
|---|---|---|---|---|---|
| 1 | Free | 60 | 240 | 3 | 1 |
| 2 | 2 Gold or 100/3m | 110 | 440 | 4 | 2 |
| 3 | 7 Gold or 400/10m | 200 | 1200 | 9 | 3 |
| 4 | 28 Gold or 2.8k/45m | 340 | 2040 | 16 | 4 |
| 5 | 83 Gold or 17k/4h | 540 | 4320 | 36 | 5 |
| 6 | 172 Gold or 56k/6h | 800 | 6400 | 64 | 7 |
| 7 | 312 Gold or 140k/11h | 1100 | 11000 | 100 | |
| 8 | 474 Gold or 430k/15h | 1500 | 14000 | ||
| 9 | 713 Gold or 860k/21h | 2200 | 19200 | ? | 13 |
| 10 | 15 |
Tents
"Produces Experience Points."
| Level | Cost to Upgrade to/Upgrade Time | Production | Holds Max | BP | Available at Council Level |
|---|---|---|---|---|---|
| 1 | 400 Supplies | 30 | 240 | 0 | 2 |
| 2 | 28 Gold or 2.8k/45m | 55 | 440 | 16 | |
| 3 | 43 Gold or 6.5k/1h30m | 100 | 800 | 25 | 4 |
| 4 | 119 Gold or 32k/5h | 170 | 1360 | 49 | 6 |
| 5 | 227 Gold or 79k/7h30m | 270 | 2160 | 81 | 8 |
| 6 | 373 Gold or 240k/13h | 400 | 3200 | 121 | 8 |
| 7 | 578 Gold or 610k/18h | 550 | 5500 | 12 | |
| 8 |
Guilds
To be added to wiki soon
Weekly Challenges
You can play challenges alone or join a guild and get more rewards.
More info to be added
Achievements
Achievements are earned by reaching certain milestones within the game and provide rewards such as gold or radios.
/***EDITOR'S NOTE: Sometimes updates come out that add new achievements, so this list may not contain all achievements within a short period of time from the latest update. Also, please update '?'s, as I did not have the information or ability to find out the values at the time of editing, once the reward is collected, I am unable to view what the reward was for that achievement.***/
| Title | Description | Reward |
|---|---|---|
| Kill walkers | Kill 50 walkers | 5 gold |
| Kill walkers II | Kill 200 walkers | ? |
| Kill walkers III | Kill 2,000 walkers | ? |
| Kill walkers IV | Kill 20,000 walkers | 300 gold |
| Complete episode | Complete EPISODE 1 | 5 gold |
| Complete episode | Complete EPISODE 2 | ? |
| Complete episode | Complete EPISODE 3 | ? |
| Complete episode | Complete EPISODE 4 | ? |
| Complete episode | Complete EPISODE 5 | 30 gold |
| Complete episode | Complete EPISODE 6 | 30 gold |
| Complete episode | Complete EPISODE 7 | 30 gold |
| Complete episode | Complete EPISODE 8 | 30 gold |
| Complete episode | Complete EPISODE 9 | 30 gold |
| Complete episode | Complete EPISODE 10 | 30 gold |
| Complete episode | Complete EPISODE 11 | 30 gold |
| Complete episode | Complete EPISODE 12 | 30 gold |
| Complete episode | Complete EPISODE 13 | 30 gold |
| Complete hard episode | Complete EPISODE 2 in hard mode | 30 gold |
| Complete hard episode | Complete EPISODE 3 in hard mode | 30 gold |
| Complete hard episode | Complete EPISODE 4 in hard mode | 30 gold |
| Complete hard episode | Complete EPISODE 5 in hard mode | 30 gold |
| Complete hard episode | Complete EPISODE 6 in hard mode | 30 gold |
| Complete hard episode | Complete EPISODE 7 in hard mode | 30 gold |
| Complete hard episode | Complete EPISODE 8 in hard mode | 30 gold |
| Complete hard episode | Complete EPISODE 9 in hard mode | 30 gold |
| Complete hard episode | Complete EPISODE 10 in hard mode | 30 gold |
| Complete hard episode | Complete EPISODE 11 in hard mode | 30 gold |
| Complete hard episode | Complete EPISODE 12 in hard mode | 30 gold |
| Complete hard episode | Complete EPISODE 13 in hard mode | 30 gold |
| Complete nightmare episode | Complete EPISODE 2 in nightmare mode | 30 gold |
| Complete nightmare episode | Complete EPISODE 3 in nightmare mode | 30 gold |
| Complete nightmare episode | Complete EPISODE 4 in nightmare mode | 30 gold |
| Complete nightmare episode | Complete EPISODE 5 in nightmare mode | 30 gold |
| Complete nightmare episode | Complete EPISODE 6 in nightmare mode | 30 gold |
| Complete nightmare episode | Complete EPISODE 7 in nightmare mode | 30 gold |
| Complete nightmare episode | Complete EPISODE 8 in nightmare mode | 30 gold |
| Complete nightmare episode | Complete EPISODE 9 in nightmare mode | 30 gold |
| Complete nightmare episode | Complete EPISODE 10 in nightmare mode | 30 gold |
| Complete nightmare episode | Complete EPISODE 11 in nightmare mode | 30 gold |
| Complete nightmare episode | Complete EPISODE 12 in nightmare mode | 30 gold |
| Complete nightmare episode | Complete EPISODE 13 in nightmare mode | 30 gold |
| Survivor I | Get a level 5 survivor | 5 gold |
| Survivor II | Get a level 10 survivor | 10 gold |
| Survivor III | Get a level 15 survivor | 30 gold |
| Get epic | Recruit epic survivor (fulfilled if legendary is recruited) | 10 gold |
| Get legendary | Recruit legendary survivor | 25 gold |
| Risk and reward | Complete 5 deadly missions | 30 gold |
| Risk and reward II | Complete 50 deadly missions | 100 gold |
| Risk and reward III | Complete 500 deadly missions | 500 gold |
| Join Guild | Join or create a guild | 2 radio |
| Do your part | Complete a challenge mission | ? |
| Get stars | Get 10 challenge stars | ? |
| Get stars II | Get 150 challenge stars | 30 gold |
| Get stars III | Get 1000 challenge stars | 100 gold |
| Council | Upgrade council to level 3 | 2 radio |
| Council II | Upgrade council to level 6 | 3 radio |
| Council III | Upgrade council to level 9 | ? |
| Council IV | Upgrade council to level 12 | 5 radio |
| Council V | Upgrade council to level 15 | 5 radio |
| All the supplies | Collect 1,000 supplies | 5 gold |
| All the supplies II | Collect 10,000 supplies | 10 gold |
| All the supplies III | Collect 100,000 supplies | ? |
| Level up | Collect 1,000 experience points | 5 gold |
| Level up II | Collect 10,000 experience points | 10 gold |
| Level up III | Collect 100,000 experience points | ? |
| Defend the camp | Kill 10 walkers in camp | 5 gold |
| Defend the camp II | Kill 100 walkers in camp | ? |
| Defend the camp III | Kill 1,000 walkers in camp | ? |
| First of many | Find epic equipment | 10 gold |
| Now we're talking | Find legendary equipment | 20 gold |
Daily Quests
You may hold up to three daily quests at any given time.
If there is room, one new quest will be added a day.
Once a day, you may choose to replace a quest with another random one.
Completion of the quest will give player a random reward.
Specific quests will reward an extra challenge star if completed on a challenge mission - see table below for specific quests that reward challenge stars.
***EDITOR'S NOTE: This is not a complete list!!! I apologize if there are any mistakes in the table, as I do not have a complete list myself and new quests may be added with updates that I am unaware of!!!***
| Quest | # | Challenge Stars? |
|---|---|---|
| Complete Story Missions | 2/3? | No |
| Collect Challenge Stars | 15 | No |
| Take No Injury | 2 | No |
| Do Not Kill Any Walkers | 1 | Yes |
| Use Melee Weapons Team | 3 | Yes |
| Use Ranged Weapons Team | 3 | Yes |
| Use All ____ Team* | 3 | Yes |
*May say any of the character classes. This quest will only appear if you have three or more survivors of that specific class.
Outposts[2]
Introduced to the game on March 1st, 2016.
Outposts are bases created by players beyond their camp. You can raid any outpost for Trade Goods and boost your own reputation. This feature brings player versus player gameplay to No Man's Land.
To get started with your outpost, first tap on the glowing fort icon on the right. Then, complete the mission to secure the outpost from Freemen. You will then get to build the new buildings and design your defense!
"Produces Trade Goods"
Maximum number: 1
| Level | Cost to Upgrade to/Upgrade Time | Production | Holds Max | BP | Available at Council Level |
|---|---|---|---|---|---|
| 1 | ? | 50 | 400 | ? | ? |
| 2 | 60 Gold or 24k/10m | 55 | 440 | 49 | ? |
| 3 | ? | ? | ? | ? | 8 |
| 4 | ? | ? | ? | ? | ? |
| 5 | ? | ? | ? | ? | ? |
| 6 | ? | ? | ? | ? | ? |
| 7 | ? | ? | ? | ? | ? |
| 8 |
Walker Pit
The Walker Pit can be used to prepare walkers for defending your outpost. Walkers can be utilized for good! You can level up the walkers you have, and you can add more walkers to your team. Level up the walker pit to capture more walkers!
| Level | Cost to upgrade to | Amount of Normal/Armored/Tank walkers | BP | Available at Council Level |
|---|---|---|---|---|
| 1 | 4/0/- | 4 | ||
| 2 | 82 Gold or 17k/4h | 4/1/0 | 43 | 5 |
| 3 | 119 Gold or 32k/5h | 6 | ||
| 4 | 172 Gold or 56k/6h | |||
| 5 | 9/2/2 | |||
| 6 | 474 Gold or 430k/15h | |||
| 7 | 713 Gold or 860k/21h | ?/?/2 |
Trade Goods
Trade Goods enable you to buy more resources to help you survive. They are used in the trade shop. The Trade Goods Store opens up once you have freed your outpost, and created your own defenses for it. They can be found in the build/shop menu or directly from the outpost's menu under "Get Crates". Currently you can get supplies, XP, and radio phones in the shop, but in the future you will also be able to get guaranteed rarity items, in addition to special items! (last updated: 2/29/16)
You can get more Trade Goods by raiding another player's outpost, or from challenge maps.
Influence
Influence is how you rate against other players, in player versus player action. It is gained by winning outpost fights.
How to win at an Outpost
You must finish one of the following three objectives:
- Capture the flag(s)
- Loot the crate(s)
- Kill the defenders!
Gallery
")
")
")
")
")
")
")
")
")
")
")
")
Videos
Trailers
")
")
Aggregate Scores
Coming Soon
References
| Walking Dead Video Games | |
|---|---|
| Consoles | |
| DLCs | |
| Collections | |
| Online | Social Game • Left Behind • Atlanta Run • Chop Shop • Bridge Constructor • Pathways • Life • Vox • Betrayal • Empires • The Sandbox • Lands |
| Mobile | Dead Yourself • Assault • Dead Reckoning • Pinball • No Man's Land • Road to Survival • All-Stars • March To War • Survivors • Our World • Casino Slots • Match 3 Tales • Dead Run • Card Trader • Encounter • ZombiECards |
| Deluxe TV Games | |
| Arcade | |
| Walking Dead Books and Magazines | |
|---|---|
| Comics | |
| Novels | |
| Short Stories | |
| Hardcovers | Book One • Book Two • Book Three • Book Four • Book Five • Book Six • Book Seven • Book Eight • Book Nine • Book Ten • Book Eleven • Book Twelve • Book Thirteen • Book Fourteen • Book Fifteen • Book Sixteen |
| Omnibus Deluxe | |
| Compendiums | |
| Specials | |
| Survivors' Guide | |
| The Covers | |
| The Poster Collection | |
| Locations of T.W.D. | |
| Coloring Books | |
| Official Magazine | |
| Companions | |
| Personal Use | |
| Art Books | |
| Other | |
| Walking Dead Shows and Short Films | |
|---|---|
| Shows | |
| Webisodes | |
| Talk Shows | |
| Podcasts | |
| Short Films | |
| Specials | |
| Featurettes | |
| Documentaries | |